SharePoint SPFx Intro & Configuration to Create New SPFx Solution
SharePoint SPFx
Introduction
1. SPFx is SharePoint Framework Extension which was newly
introduced in SharePoint 2016 Online.
Why SPFx?
1. The world is moving more and more towards client-side development.
No matter how good the back-end architecture is, what the user gets to see is
user interface. If the user doesn't feel a smooth and lag free experience, user
would certainly complain.
2. With these advancements in technologies, SharePoint has
decided to focus more towards improving the user experience with the product. So,
this opens a world of endless possibilities for developers working with
SharePoint. This means Microsoft SharePoint now has full support for open
source tool chain.
Configuring
Development Environment
2.
Install Yeoman and
gulp
a. What
is Yeoman & What it will do?
b. What
is gulp & What it will do?
3.
Install Yeoman SharePoint
generator template
a. The
Yeoman SharePoint web part generator helps you quickly create a SharePoint
client-side solution project with the right toolchain and project structure.
To install the SharePoint Framework Yeoman generator globally, enter the
following command in Node JS Command Prompt:
npm
i -g @microsoft/generator-sharepoint
b. If
you need to switch between the different projects created by using different
versions of the SharePoint Framework Yeoman generator, you can install the
generator locally as a development dependency in the project folder by
executing the following command in PowerShell:
npm
install @microsoft/generator-sharepoint –save-dev
Once you are done with the installation, you
will be able to create new webparts using SharePoint framework.
4.
Install a Code Editor
The steps and
examples in this documentation use Visual Studio Code, but you can equally use any editor of your
choice.
5.
How to create New SharePoint SPFx Project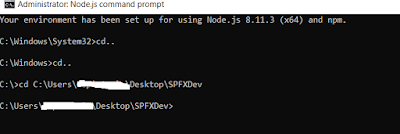

f. This will request a couple of details, enter
all of those, and that will create the new project for you.
ii. What
is the SharePoint version? 
iii. Select
if the admin should have the option to deploy this app to all site or not.

iv. Select the type of client-side component.
v. Enter
the webpart name & Enter the webpart description

vi. After
the configuration, there is a confirmation message like the following.

vii. Select the framework of the webpart, this is
just for scaffolding purpose
Sharing is caring.... Enjoy SharePoint Coding.....


Comments
Post a Comment