Posts

SharePoint SPFx Intro & Configuration to Create New SPFx Solution
Image
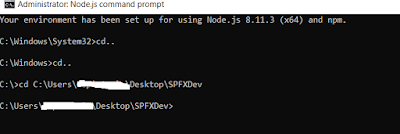
SharePoint SPFx Introduction What is SPFx? 1. SPFx is SharePoint Framework Extension which was newly introduced in SharePoint 2016 Online. 2. SPFx is introduced on replacement of  SharePoint Visual Web Parts (SP Visual Web Parts can't be deployed to SharePoint Online). 3. In SPFx we can 3 types of solutions like  Web Part, Extensions and Library . Why SPFx? 1.  The world is moving more and more towards client-side development. No matter how good the back-end architecture is, what the user gets to see is user interface. If the user doesn't feel a smooth and lag free experience, user would certainly complain. 2. With these advancements in technologies, SharePoint has decided to focus more towards improving the user experience with the product. So, this opens a world of endless possibilities for developers working with SharePoint. This means Microsoft SharePoint now has full support for open source tool chain. Configuring Development Environment    

SharePoint CSOM to Create Folders and Sub Folders based on Excel Data

Contents: 1. Reading data from the Excel sheet. 2. Connecting to SharePoint Online Site & Checking the SharePoint list is available or not. 3. Creating the SharePoint Library Folders and Sub Folders. 4. Conclusion. 1. Reading data from the Excel sheet: a. Open Visual Studio, Select New Project Creation and Select C# Console application and provide the appropriate Solution name. b. First add the required references like below.     I . using Microsoft.SharePoint.Client;     II. using System.Configuration; (Used to read the data from the App.config file)     III. using Microsoft.Office.Interop.Excel; (Excel supported file reference)     Note: If above references and not able to add please install the references from the NuGet Package  Manager Console. To Read the values from the App.config file use the below  and declare all the fields globally for re-usability.                 public   static   string  userName = ConfigurationManager.AppSettings[ "Username&qu

Adding days to date while ignoring weekends using Javascript

1. In this post we can learn declaring the date picker in html page and getting the selected value. 2. Setting the date picker control disabling the weekends and disabling the previous dates. 3. Adding the Number of days to Selected date with Excluding the Weekends. HTML Code Snippet: <div>            <label>                Start Date:                 </label>            <input type="text" id="_startDatePicker" readonly>         </div>               <div style="margin-top: 10px;">             <label>Date after adding Days:</label>             <input type="text" id="_duration" disabled>         </div> CSS and JS reference Files:  <link href="datepicker.css" rel="stylesheet" type="text/css">         <link href="https://cdnjs.cloudflare.com/ajax/libs/jqueryui/1.12.1/jquery-ui.css" rel="stylesheet" typ

Declaring SharePoint Client Side Taxonomy Picker Control and Reading the Selected Values and Create Item in List

In this post, We will learn how to declare the SharePoint Client Side Taxonomy Picker control and reading the values from it. Step 1: References required to load the Taxonomy Picker Control Correctly. CSS Reference: Try to download it (Refer if  already have in your sites) <!-- CSS Files -->              < link href = "/taxonomypickercontrol.css" rel = "stylesheet" / > <!-- Javacript Files --> JS References Files: < script src = "https://cdnjs.cloudflare.com/ajax/libs/jquery/3.4.1/jquery.min.js" > < / script > < script type = "text/javascript" src = "../_layouts/15/SP.Taxonomy.js" > < / script > < script type = "text/javascript" src = "/taxonomypickercontrol.js" > < / script > < script type = "text/javascript" src = "/taxonomypickercontrol_resources.en.js" > < / script >